Today I will be taking you through an easy to follow Kodi setup guide. Kodi (XBMC) has been around for awhile now starting life out as XBMC on the original Xbox in 2003. The name XBMC comes from the acronym of its original name – Xbox Media Center.
It comes in several flavors including Mac OSX, Windows, Linux, Android, iOS and more recently for the Raspberry Pi. You can download the version you need from here.
Here is a screenshot of how I have my home page including shortcut icons.
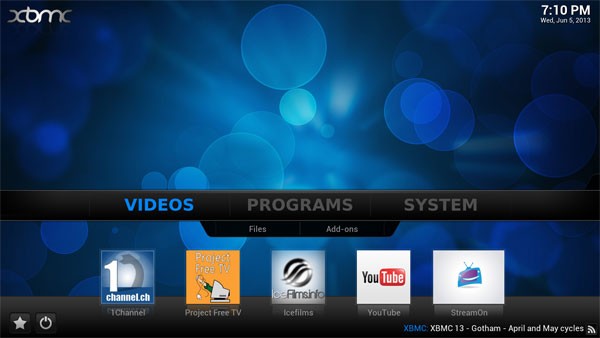
Kodi is a great media center and a great choice for anyone looking to setup a HTPC system. As you can see, it has several plugins available such as YouTube, Hulu and Netflix etc. But for the less morally conscious people out there, you can also install plugins for IceFilms and Navi X meaning you get all the latest movies and TV shows streamed right to Kodi HTPC for free, and usually with a HD option.
Installating Kodi
In this setup guide, I am going to be using a Windows based HTPC. If you are going to be installing on a different operating system, the Kodi setup process is identicle except you will need to follow the installation instructions for your particular OS.
- Download the Windows installer from the Kodi website.
- Run the installer once its finished downloading and follow the onscreen instructions.
Now have Kodi installed so go ahead and double click the icon to run it. You should end up at the default home page like this.
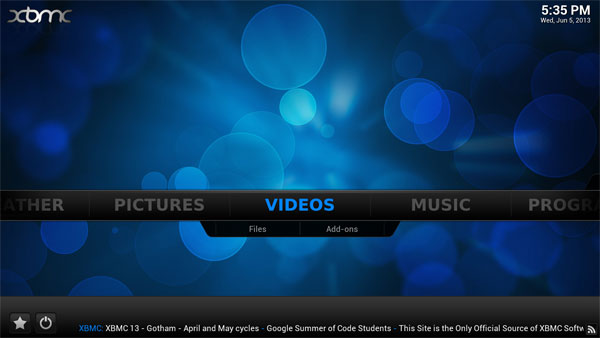
This is the part that puts most people off as it isn’t immediately clear what to do next. How do you install all the repositories and plugins I hear you ask?
Setting Up Fusion in Kodi
To make setup super easy and instead of sending you to various websites to download individual plugins, I’ve found a web address that has all the main plugins in one place! All you need to do is add https://fusion.tvaddons.ag/ address to Kodi’s file manager.
To do this, use your mouse or keyboard arrow keys, move the navigation bar to the far right and select,
- System > File Manager.
- On the A root side, select Add Source.
- Enter the address https://fusion.tvaddons.ag/
- Enter a name for the source below. I just named mine “Fusion”.
Now you have the source setup, you can easily setup all the major plugins and repositories most people use Kodi for. For an example, let’s continue by installing the 1Channel plugin.
- Go to System > Settings.
- Click on the Add-ons tab and select Install From Zip File.
On the right you will see a list of places you can install zip files from. You should see the drive named “Fusion” that we just created a minuet ago.
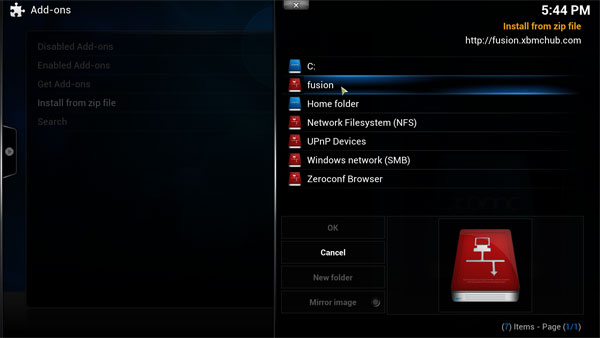
- Click Fusion > Videos > Repositories > 1channel-rapository.xxxxx.zip
This will install the 1Channel repository to Kodi, you should see a popup in the bottom right corner informing you it was correctly installed. You now need to enable 1Channel plugin so head back to the home page by pressing to Home button in the bottom right and go to,
- Videos > Add-Ons > Get More… > 1Channel Plugin > Install.
Once installed, you should see that 1Channel in now enabled. To check it’s all working, navigate back to the home page.
- Videos > Add-Ons > 1Channel > Movies > Most Popular.
You should now see a list of what’s popular at the moment on 1Channel.
I recommend repeating this process and install all the other plugins and programs you want to use with Kodi.
(The plugins most people use for movies and TV shows are 1Channel, IceFilms, ProjectFreeTV and NaviX which are all available in the Fusion source we’ve just setup.)
Setting Up Shortcut Icons
As you can see from my first screenshot, I have setup Kodi to use large shortcut icons for the plugins I use most. I use a remote with my HTPC and I find it much easier navigating Kodi using them. To set them up, you need to be using the default skin Confluence.
- System > Settings > Appearance.
- Under the Skin tab, select settings from the right.
- Under the Add-On Shortcut tab, select which add-ons on the Home Page Videos Sub menu.
Have fun watching all your favorite movies and TV shows for free! If you have any questions about my Kodi setup guide, please leave them in the comment section below.

